This blog entry walks the reader through the configuration of Oracle Webcenter Capture (formerly known as Oracle Document Capture) in support of EBS Receipt Processing as part of the Oracle Webcenter Imaging (formerly known as Oracle Imaging and Process Management, Oracle I/PM) solution. Oracle Webcenter capture is responsible for production level document scanning and indexing and is an integral part of Oracle WebCenter Imaging, which provides an enterprise level end-to-end platform for managing document images within transactional business processes.In this scenario, the following components will be configured within Webcenter capture: File Cabinet, Index Profile, Import Server, Recognition Server, and the Commit Server.
• File Cabinet, part of the Capture Administration, is the “container” into which batches are scanned. As part of the file cabinet, index fields can be defined such that the values entered can be searched upon within the content management system such as Oracle Webcenter Imaging. In this case, the value(s) will be autopopulated by the Recognition Server when it reads the barcode of an Expense Report. The same index fields could be populated from a pick-list or a database lookup.
• Index Profile: Enables additional configuration changes that need to be applied when users will need to index a batch.
• Import Server: Imports images directly into Oracle Webcenter Capture from multiple sources including network folders, email, FTP sites, list files, and fax providers.
• Recognition Server: This component is used to automate indexing through the recognition of barcode technology. For example, recognition server will interpret the barcode on an expense report, and will commit the document as soon as it has completed indexing the value.
• Commit Server: This component processes batch commits on a scheduled basis. For example, the scanning and indexing could occur on independent workstations during business hours while the commit process using the commit server could occur during the off-peak hours.
Assumptions:
• A ‘Receipts’ Application has already been created in Oracle WebCenter Imaging.
• Connectivity between Oracle Webcenter Capture and Oracle WebCenter Imaging.
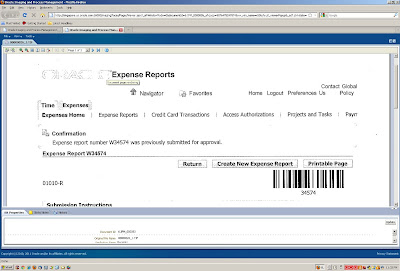
• Receipts are submitted with a cover sheet that contains a bar code with the expense report number.
1. First step would be to create a File Cabinet in Oracle Webcenter Capture. Call it ‘Expenses’.
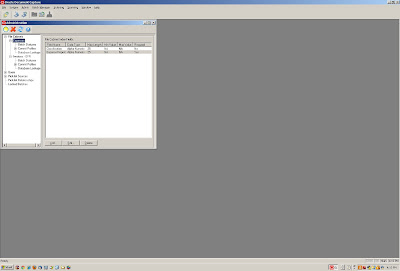
2.Add 2 Index Fields, Expense Report and Classification. Ensure that both parameters are alphanumeric and have a max length of 25. Make sure that Expense Report is a Required Field. The values from the Index fields will be passed into the Imaging Application.

• Index Profile: Enables additional configuration changes that need to be applied when users will need to index a batch.
• Import Server: Imports images directly into Oracle Webcenter Capture from multiple sources including network folders, email, FTP sites, list files, and fax providers.
• Recognition Server: This component is used to automate indexing through the recognition of barcode technology. For example, recognition server will interpret the barcode on an expense report, and will commit the document as soon as it has completed indexing the value.
• Commit Server: This component processes batch commits on a scheduled basis. For example, the scanning and indexing could occur on independent workstations during business hours while the commit process using the commit server could occur during the off-peak hours.
Assumptions:
• A ‘Receipts’ Application has already been created in Oracle WebCenter Imaging.
• Connectivity between Oracle Webcenter Capture and Oracle WebCenter Imaging.
• Receipts are submitted with a cover sheet that contains a bar code with the expense report number.
1. First step would be to create a File Cabinet in Oracle Webcenter Capture. Call it ‘Expenses’.

2.Add 2 Index Fields, Expense Report and Classification. Ensure that both parameters are alphanumeric and have a max length of 25. Make sure that Expense Report is a Required Field. The values from the Index fields will be passed into the Imaging Application.


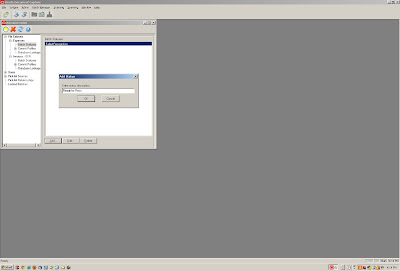
3. Add Batch Statuses that indicate 'Ready for Recognition' and 'Failed Recognition'.
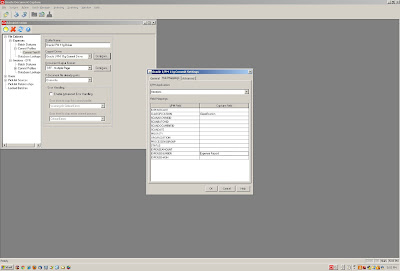
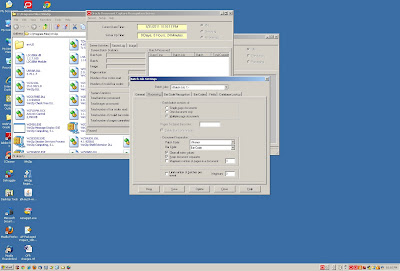
4. Under the Commit Profile, edit the Profile.
Profile Name: Oracle IPM11g Driver Change the Commit Driver to Oracle I/PM 11g Commit Driver Ensure that the Document Output Format is Tiff-Multiple
Page. If a document already exists, overwrite.
5. Click on 'Configure' on Oracle I/PM 11g Commit Driver.
On the General Tab ensure the following: Direct Commit. UserID:e.g weblogic Password: e.g welcome1 Security Policy: Basic Security IPM Service URL: http://
http://singapore.us.oracle.com:16000/imaging/ws Click Connect.
ODC Field: Expense Report to IPM Application Field: Expense Number ODC Field: Classification to IPM Application Field: Classification Click OK when done.
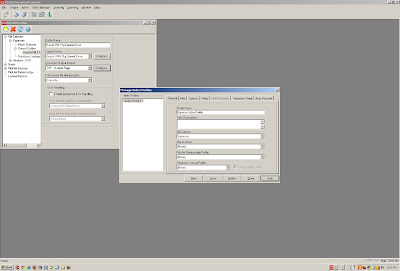
7. The next step is to create an Index Profile. Within Oracle WebCenter Capture, Click on Indexing and then Manage Index Profiles.
On the General Tab Profile Name: Expense Index Profile File Cabinet: Expenses
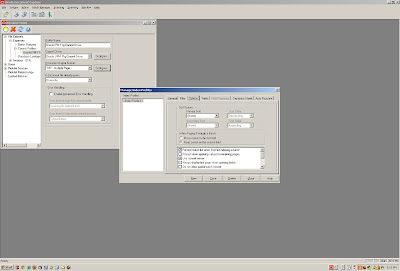
8, Skip the Filter Tab and click the Option Tab. Check the ‘Use the Commit Server’ option.
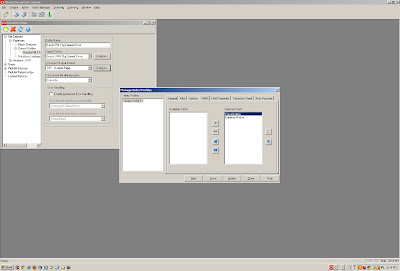
9 .Click on the Fields Tab and select the ‘Classification’ and ‘Expense Report’ values.
10, Save the Index Profile and Close. The next step is to configure the Import Server
11. Click on the Import Server, Setup, Batch Jobs, Folder/List Provider. Add Job. On the
General Tab
File Cabinet: Expenses
Batch Prefix: EXP
Default Batch Status: Ready for Recognition
Import from Folder.
Import Folder:e.g C:\Oracle\Document Capture\ExpenseImport
After Import: Rename image file extension To: dun
Save and Close.
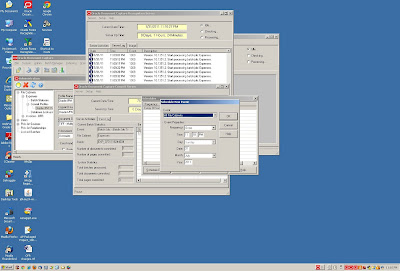
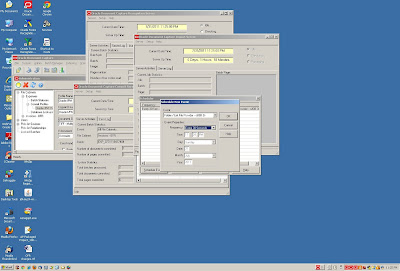
14. Click on the Bar Code Recognition Tab. Uncheck the Enable the Auto-detect and select the Code-128.
 15. Click on the Bar Codes Tab. Click on ‘New’ under the Bar Code Definitions.
Description: Bar Code
Validation Rule: mask
Mask:#####.
Since it is expected that the expense report number would be 5 characters, the mask would be #####. If the expense report number were 6 characters, the mask would be expected to be ######.
Click Save.
17. Click on the Fields Tab.
Index Field Name: Classification
Auto Populate with: Default
Value: EXPENSE
Index Field Name: Expense Report
Auto Populate with: Bar Code
Description: Bar Code
Click on Save and Close.
File Cabinet: Expenses
Process all batch prefixes
Process all batch statuses
20. Schedule and Activate the Commit Server.
In the Scheduler, click on the Schedule Event.
Event: All File Cabinets
Frequency: Every 30 seconds.
Click OK and Close.
On the Commit Server, Click on 'Activate' under the 'Server' Menu.
21. Follow the same procedure for the Recognition Server and Import Server. When scheduling the Event for the Recognition Server, select ‘Expenses’ for the Event and ‘Every 30 seconds’ for the Frequency. Activate the Event.

22. Schedule the Job in the Import Server ensuring that the images will be picked up from the right import folder and choose the frequency as ‘Every 30 seconds’. Activate the Event.
23. Once the servers are activated, the image of the expense report should be picked up from the Import folder and processed through the recognition server where the expense report number should be retrieved and committed through to the Imaging server.
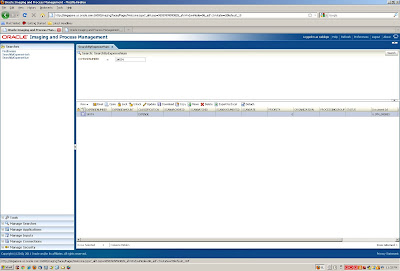
24. In the Imaging Application, do a search for the committed Expense Report.

4. Under the Commit Profile, edit the Profile.
Profile Name: Oracle IPM11g Driver Change the Commit Driver to Oracle I/PM 11g Commit Driver Ensure that the Document Output Format is Tiff-Multiple
Page. If a document already exists, overwrite.

5. Click on 'Configure' on Oracle I/PM 11g Commit Driver.
On the General Tab ensure the following: Direct Commit. UserID:
http://singapore.us.oracle.com:16000/imaging/ws Click Connect.

ODC Field: Expense Report to IPM Application Field: Expense Number ODC Field: Classification to IPM Application Field: Classification Click OK when done.

7. The next step is to create an Index Profile. Within Oracle WebCenter Capture, Click on Indexing and then Manage Index Profiles.
On the General Tab Profile Name: Expense Index Profile File Cabinet: Expenses

8, Skip the Filter Tab and click the Option Tab. Check the ‘Use the Commit Server’ option.

9 .Click on the Fields Tab and select the ‘Classification’ and ‘Expense Report’ values.

10, Save the Index Profile and Close. The next step is to configure the Import Server
11. Click on the Import Server, Setup, Batch Jobs, Folder/List Provider. Add Job. On the
General Tab
File Cabinet: Expenses
Batch Prefix: EXP
Default Batch Status: Ready for Recognition

Import from Folder.
Import Folder:
After Import: Rename image file extension To: dun
Save and Close.

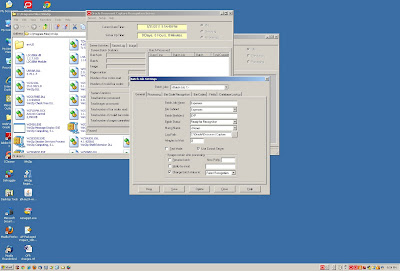
13. Configure the Recognition Server. Click on Setup and then Batch Job
General Tab.
Batch Job Name: Expenses
File Cabinet: Expenses
Batch Prefixes: EXP
Batch Status: Ready for Recognition
Minutes to Wait: 0.
Check the ‘Use Commit Server’.
Check and Change Batch Status to: Failed Recognition.

14. Click on the Bar Code Recognition Tab. Uncheck the Enable the Auto-detect and select the Code-128.
 15. Click on the Bar Codes Tab. Click on ‘New’ under the Bar Code Definitions.
Description: Bar Code
Validation Rule: mask
Mask:#####.
Since it is expected that the expense report number would be 5 characters, the mask would be #####. If the expense report number were 6 characters, the mask would be expected to be ######.
Click Save.

16. Move to the Processing Tab.Bar Code: Bar Code. (This was created in the prior step).Check 'Clear All Index Values' and 'Keep Document Seperator.

17. Click on the Fields Tab.
Index Field Name: Classification
Auto Populate with: Default
Value: EXPENSE
Index Field Name: Expense Report
Auto Populate with: Bar Code
Description: Bar Code
Click on Save and Close.

18. Configure the Commit Server.
Click on Setup and the Batch Jobs.
On the General Tab Click New.Check the Expenses File Cabinet.

File Cabinet: Expenses
Process all batch prefixes
Process all batch statuses

20. Schedule and Activate the Commit Server.
In the Scheduler, click on the Schedule Event.
Event: All File Cabinets
Frequency: Every 30 seconds.
Click OK and Close.
On the Commit Server, Click on 'Activate' under the 'Server' Menu.

21. Follow the same procedure for the Recognition Server and Import Server. When scheduling the Event for the Recognition Server, select ‘Expenses’ for the Event and ‘Every 30 seconds’ for the Frequency. Activate the Event.

22. Schedule the Job in the Import Server ensuring that the images will be picked up from the right import folder and choose the frequency as ‘Every 30 seconds’. Activate the Event.

23. Once the servers are activated, the image of the expense report should be picked up from the Import folder and processed through the recognition server where the expense report number should be retrieved and committed through to the Imaging server.
24. In the Imaging Application, do a search for the committed Expense Report.


Hello,
ReplyDeleteIn July 2013, Webcenter Enterprise Capture was released with 11.1.1.8 FMW release. As I understand this is more like a ADF application.
Where can I found information on this product?
Thanks,
Ciprian
will the attachments visible on AP invoice workbench?
ReplyDelete